
As you might be able to tell from this website’s name, Radagast (also called Aiwendil) used to be my favourite character in the Lord of the Rings. I really liked Games Workshop depiction of him, way before the Hobbit films. I think the classic metal miniature is great and I fondly remember getting him for my birthday when I was 11 years old and wanting to give him the absolutely best paint job my inexperienced self could give him. A few years later he was the centre of DeAgostini’s Battle Games in Middle-earth magazine issue number 79, the very first ‘expanded universe’ issue. In that magazine there is a tutorial for making Radagast’s Cabin. I’ve always loved the look of it and wanted to build it one day.
Today is that day. But, the cabin is actually part of a double feature, because I decided I also wanted to build Radagast’s House as depicted in The Hobbit. That build might actually be the more interesting one, because I couldn’t find any tutorials or builds for it, other than some LEGO builds. It also stands out a bit more. The classic Radagast cabin is generic enough to use for different occasions. It could easily be a generic cabin, but I think it would also work well as the House of Tom Bombadil (as is suggested in Battle Games in Middle-earth issue number 80), or even the House of Beorn. I adjusted the height slightly and used both Radagast and Beorn for scale so that it could work for both.
Requirements
- Balsa wood (2,5 mm thick)
- Balsa wood (1 mm thick)
- Foamboard (5 mm thick)
- Cardboard (3 mm thick)
- Heavy paper (only for the Hobbit version; for the windows)
- Synthetic fur (only for the Hobbit version; for the roofs)
- XPS foam (only for the BGIME version; for the chimney)
- Filler (only for the BGIME version)
- Twigs
- Slate chippings (for stepping stones)
- Masking tape
- Basing materials
- Paints (Black primer, Doombull Brown, Eshin Grey, Mechanicus Standard Grey, Dawnstone, Mournfang Brown, Steel Legion Drab, Ushabti Bone). Additional paints for the Hobbit version: Balor Brown, Zandri Dust.
Building Radagast’s House (The Hobbit version)
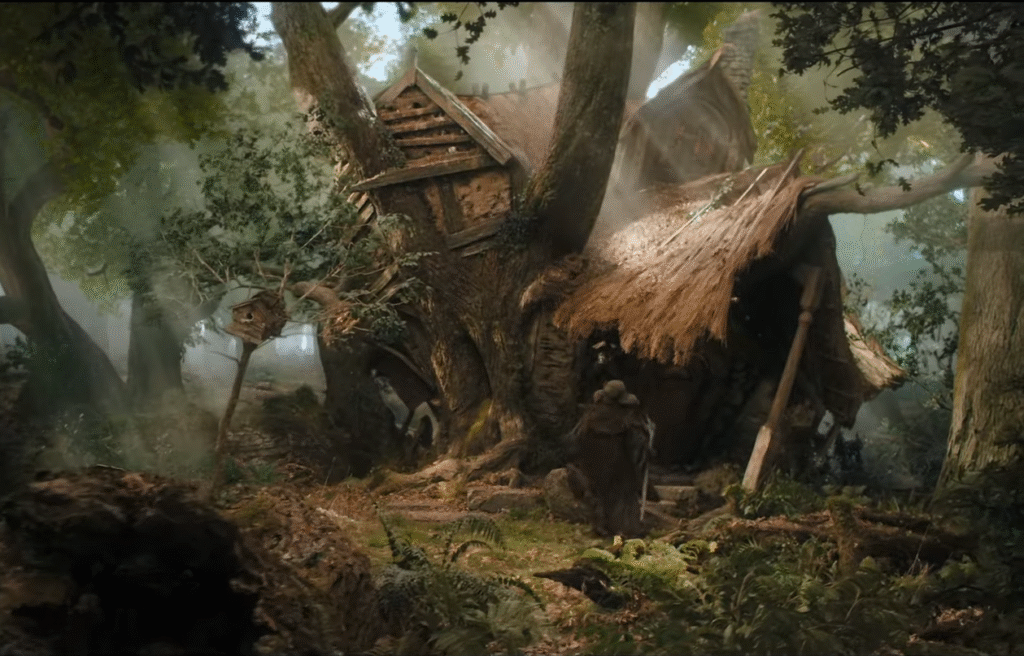
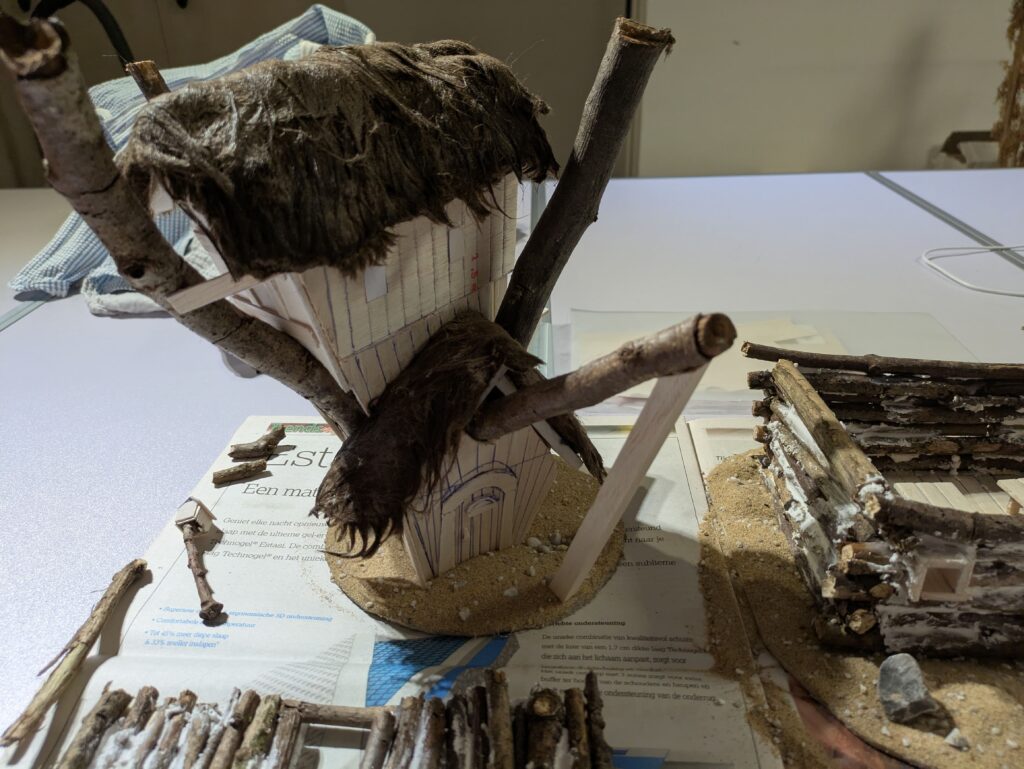
1. I started by gathering some twigs/sticks and letting them completely dry for a couple of days. I chose longer ones that were a bit straight, about 25 cm long. These will become part of the tree that Radagast’s House is built in/around.
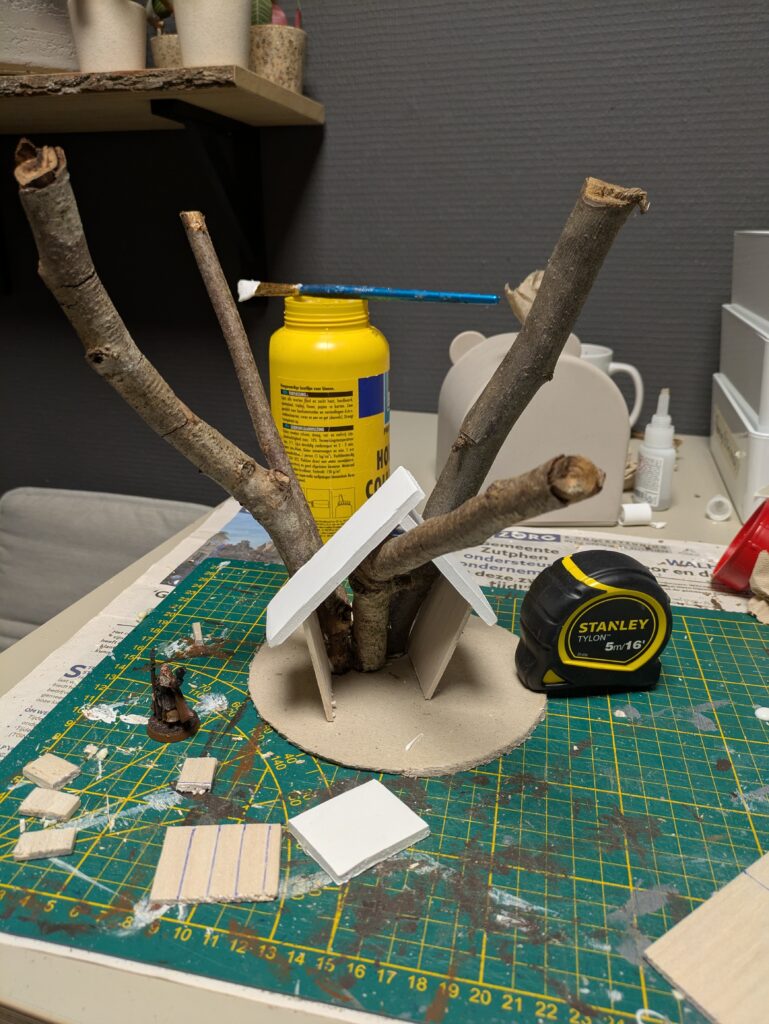
2. I cut a 3 mm thick cardboard in a circle of about 15 cm/6″ diameter. I then positioned the twigs in a way that somewhat matches the reference image above, but also makes it practical enough to build a house around, in as few straight foamboard pieces (for the roof) and balsa wood pieces (for the walls) as possible. I used PVA glue where I had twig-on-twig contact, as well as super glue to glue it to the base. I also used a nail to pin two twigs together.
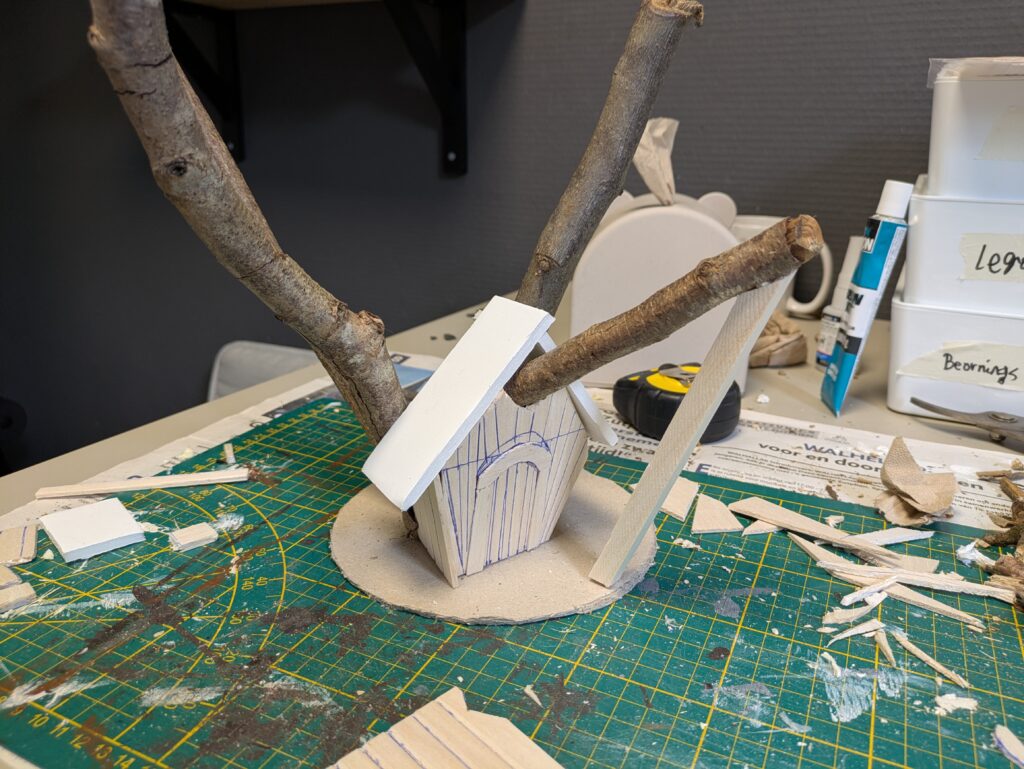
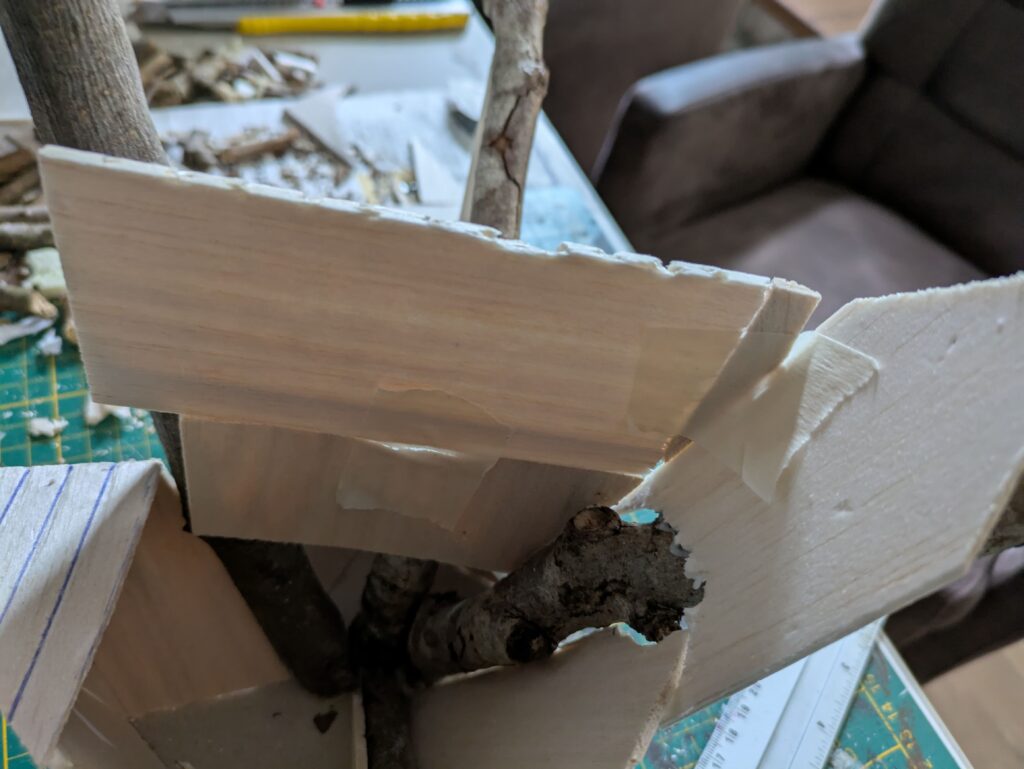
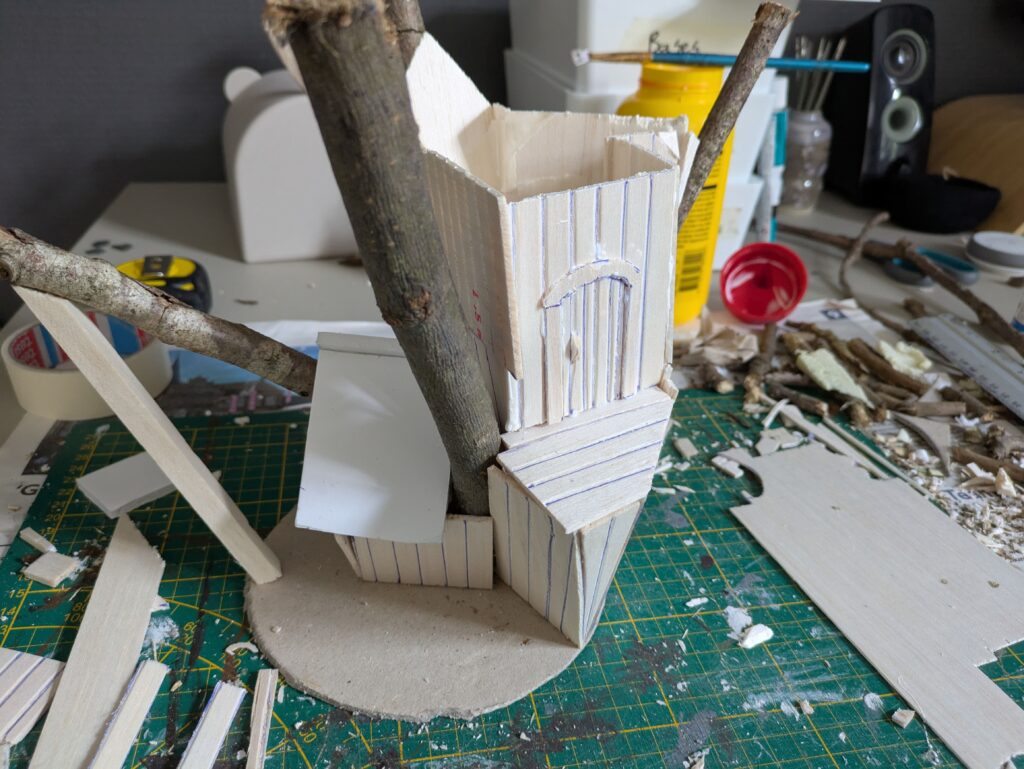
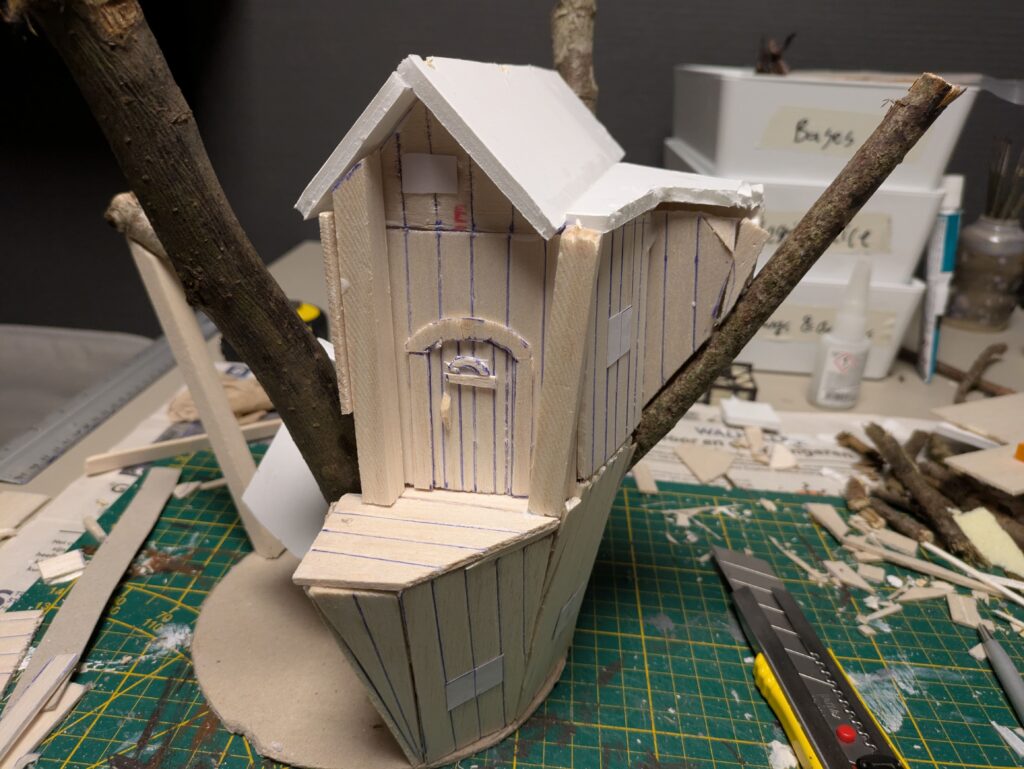
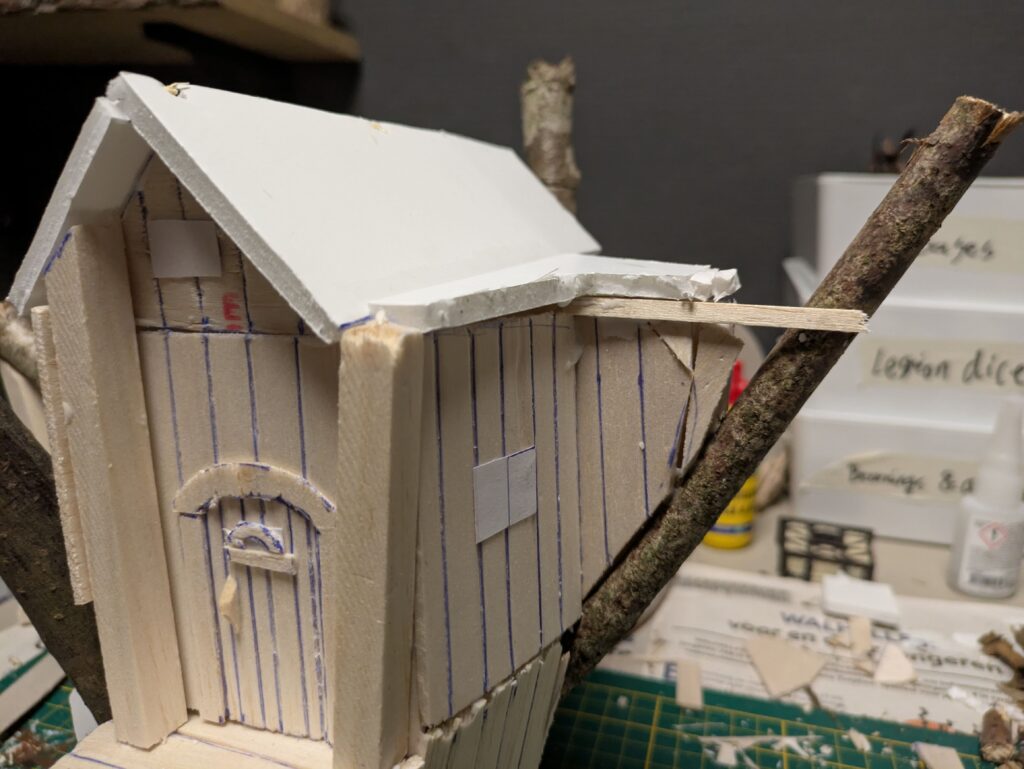
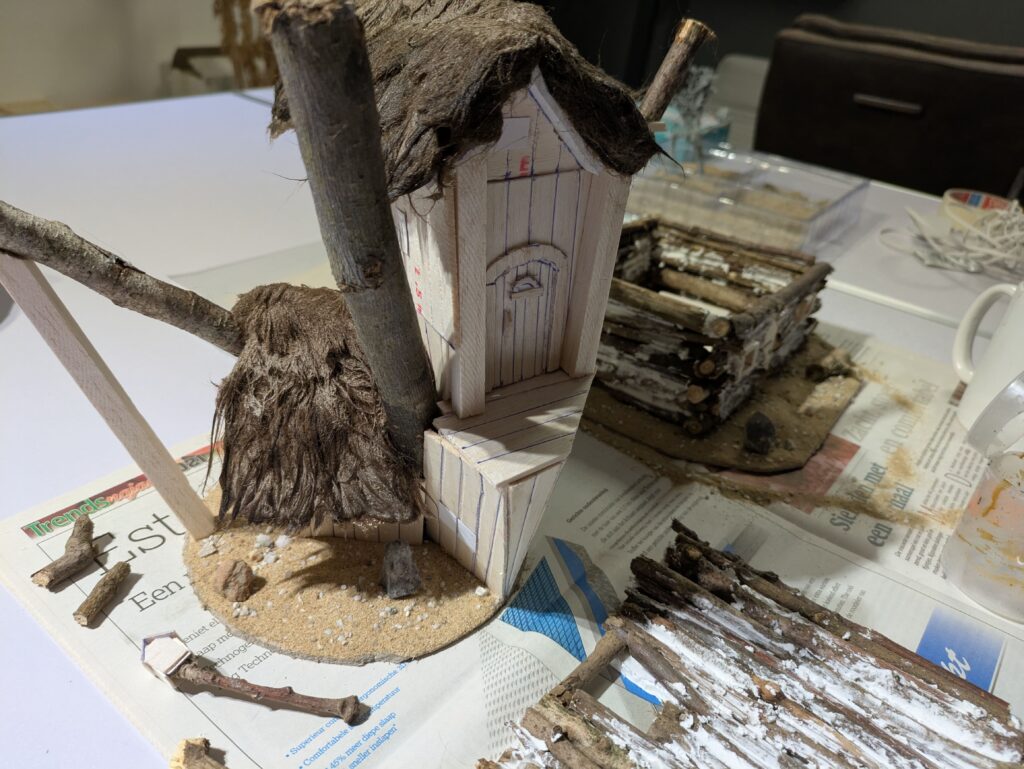
3. Once everything is fully dry and bonded, it is time to actually build the house. To save time and make it less of a hassle, I used whole pieces of balsa wood (2,5 mm thick) that I drew lines on approximately every centimetre. By drawing deep and perhaps even making light cuts, this creates the illusion of different planks. I suppose it would be more detailed to cut individual planks, but that would take a lot more time and effort and would probably not line up as nicely, unless you’re really neat and precise. If it’s hard to glue, you can use masking tape to let the pieces stay in place.


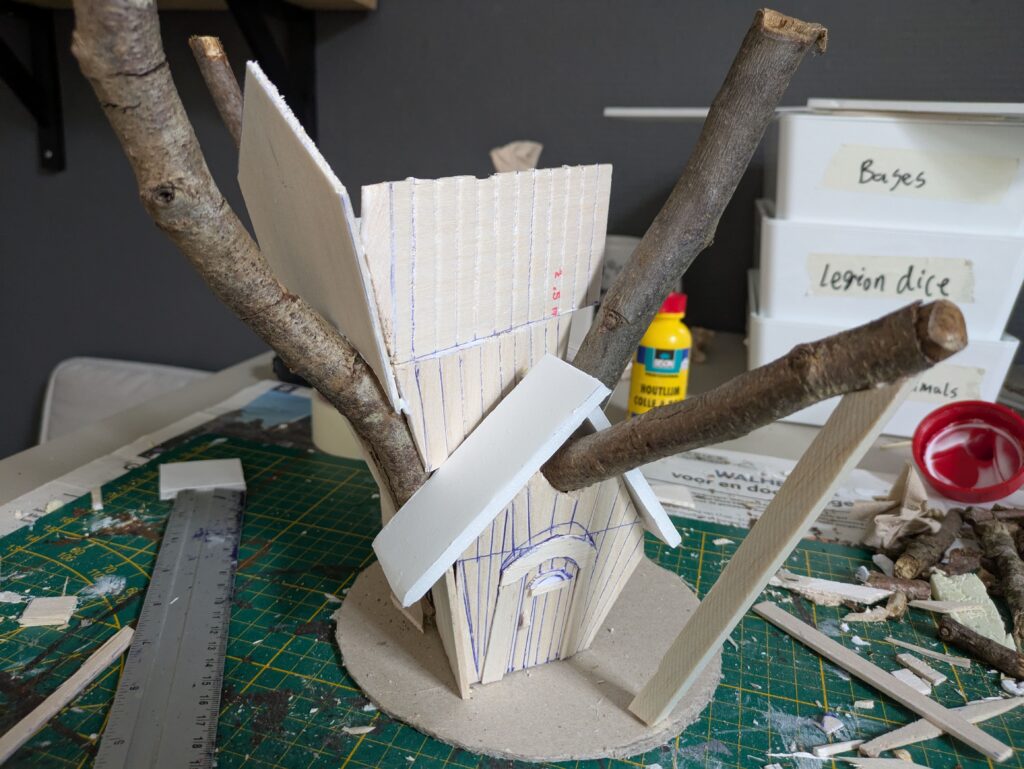
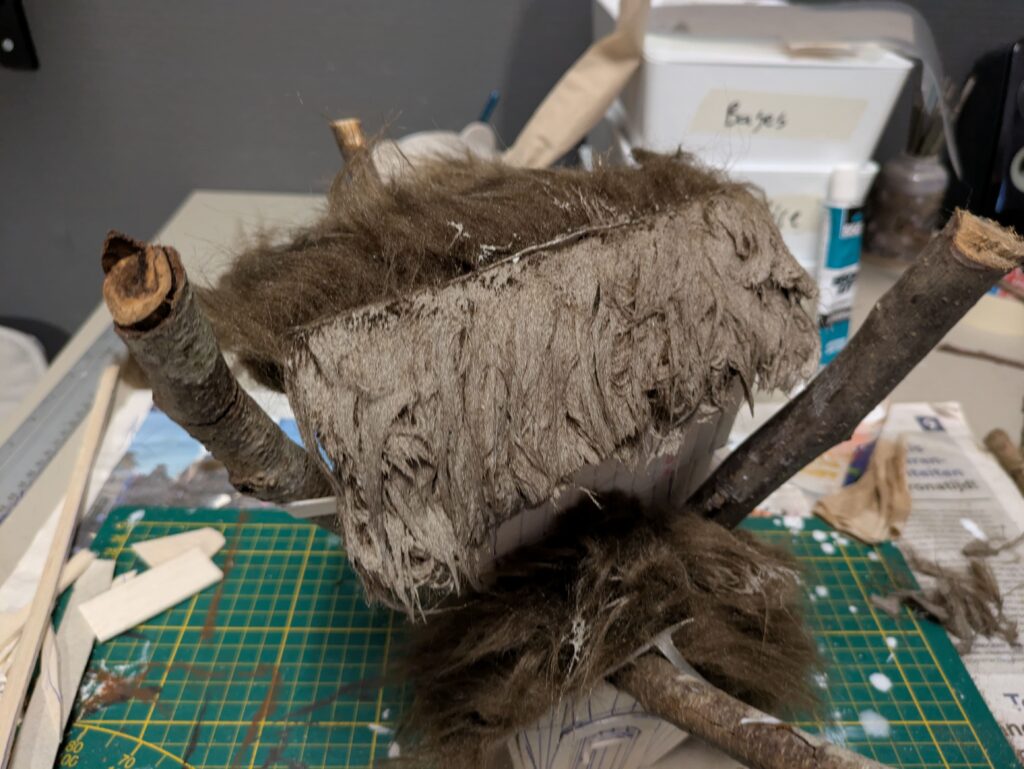
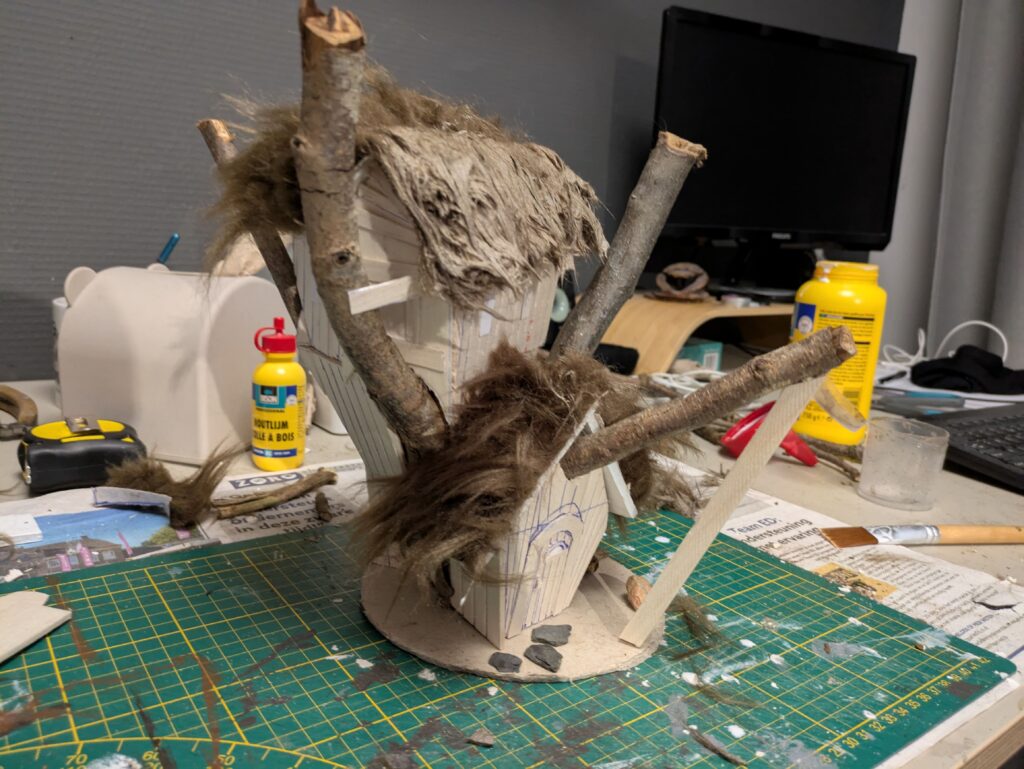
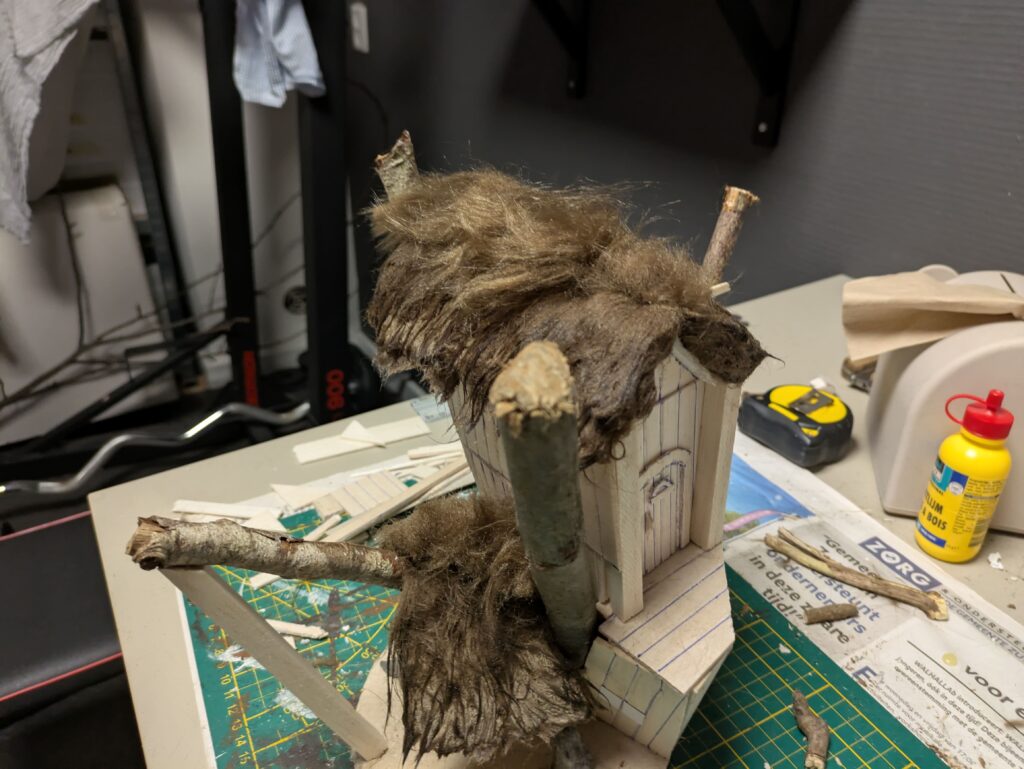
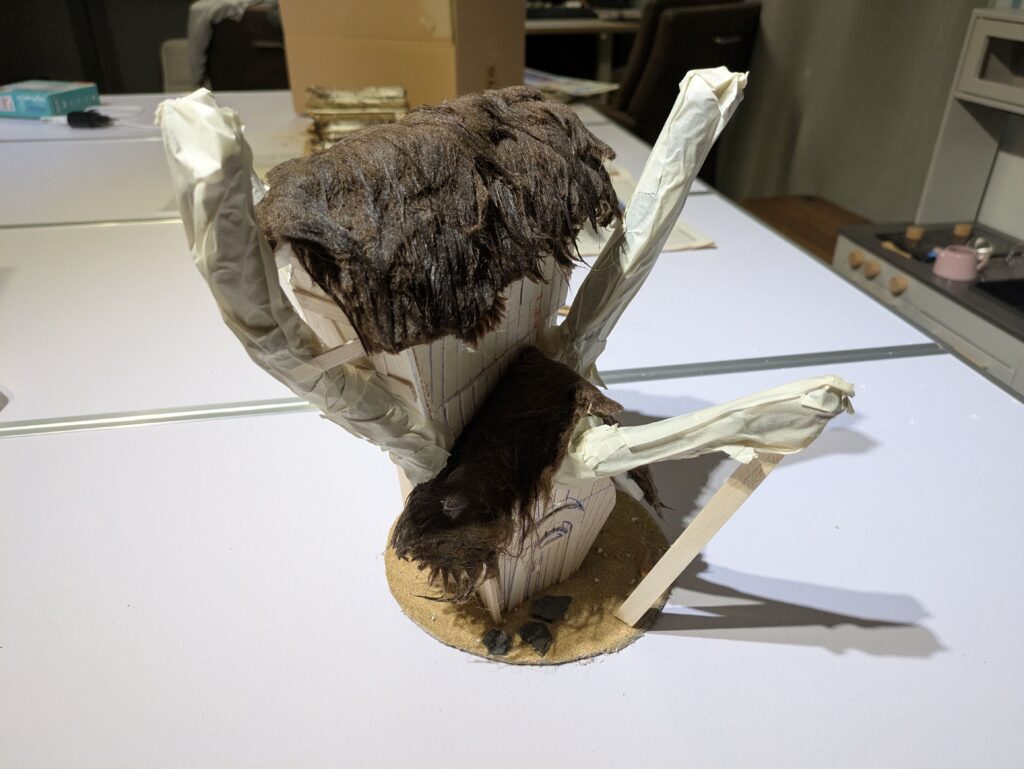
4. Time to put up the roof on the top floor. I used foam board, which will serve as a solid foundation for the synthetic fur that will later cover it to give it a thatched roof look.
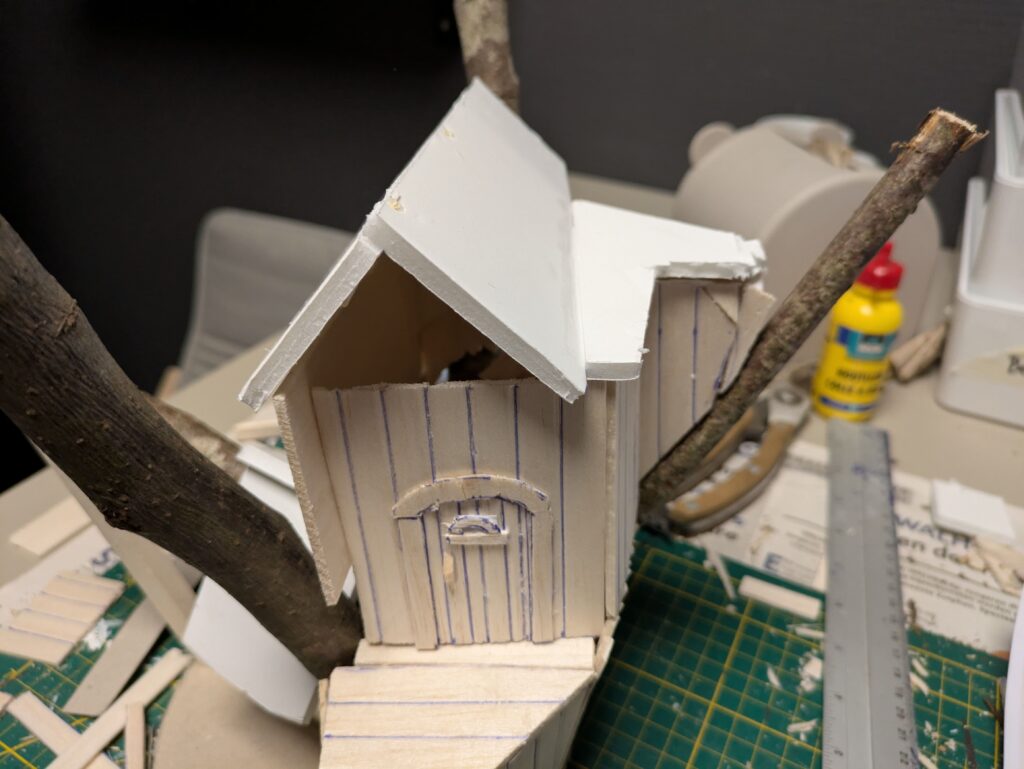
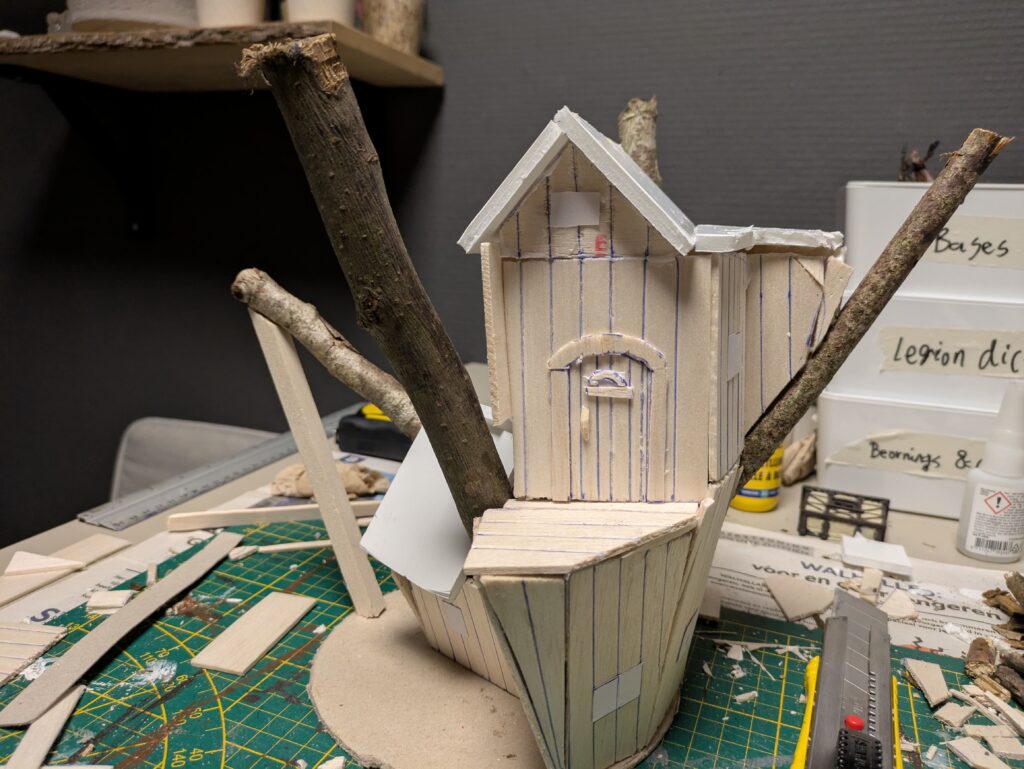

5. Before adding the synthetic fur for the roof, it is time for the final details (for now). There are some loose planks at the top that are nailed to the tree. I also decided to add some pillars on both sides of the door on the second storey. Finally, I used heavy paper cut in 1 by 1,5 cm rectangles to be used as windows.

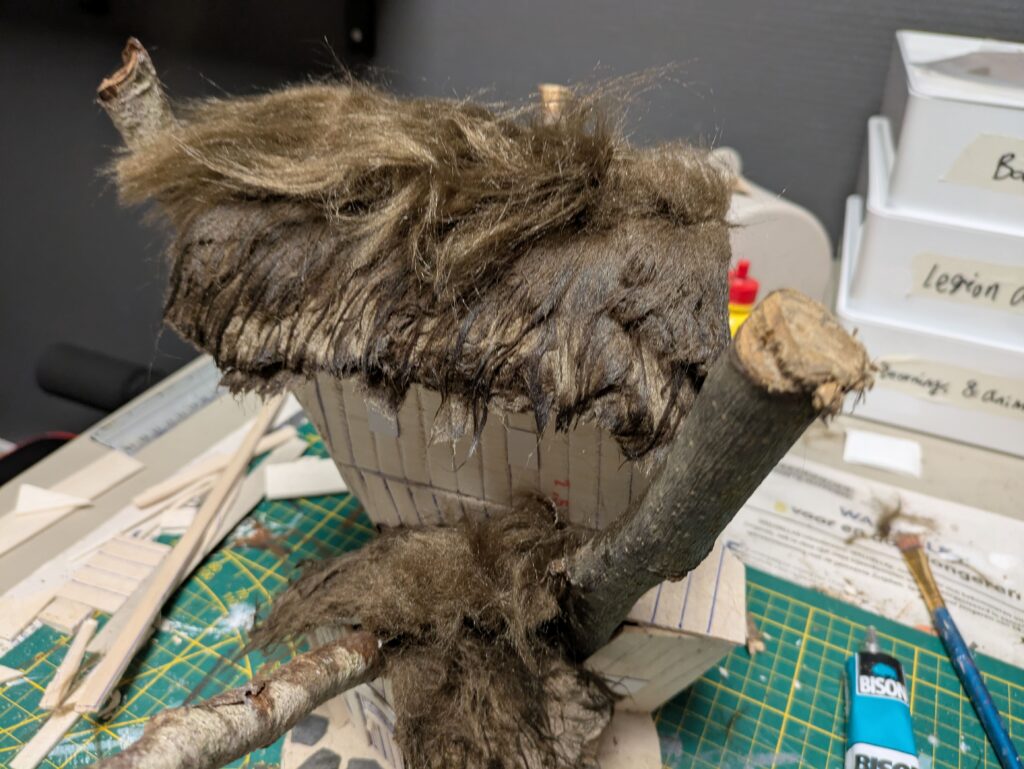
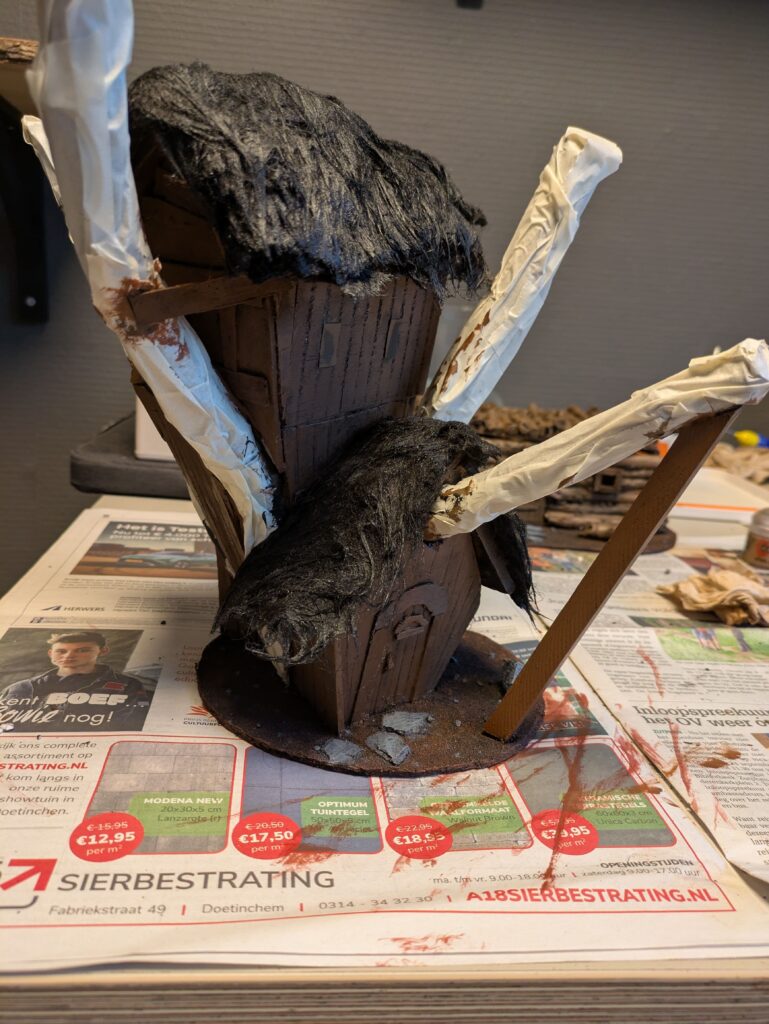
6. I glued the synthetic fur to the foamboard roof using PVA glue, one piece for every side. Once dry, I used a 50:50 PVA:water mix and brushed the fur upright. When the fur is completely soaked, I used the same PVA glue and water mix to brush the fur downwards. This creates the thatched roof look, as described in Battle Games in Middle-earth Magazine #50.
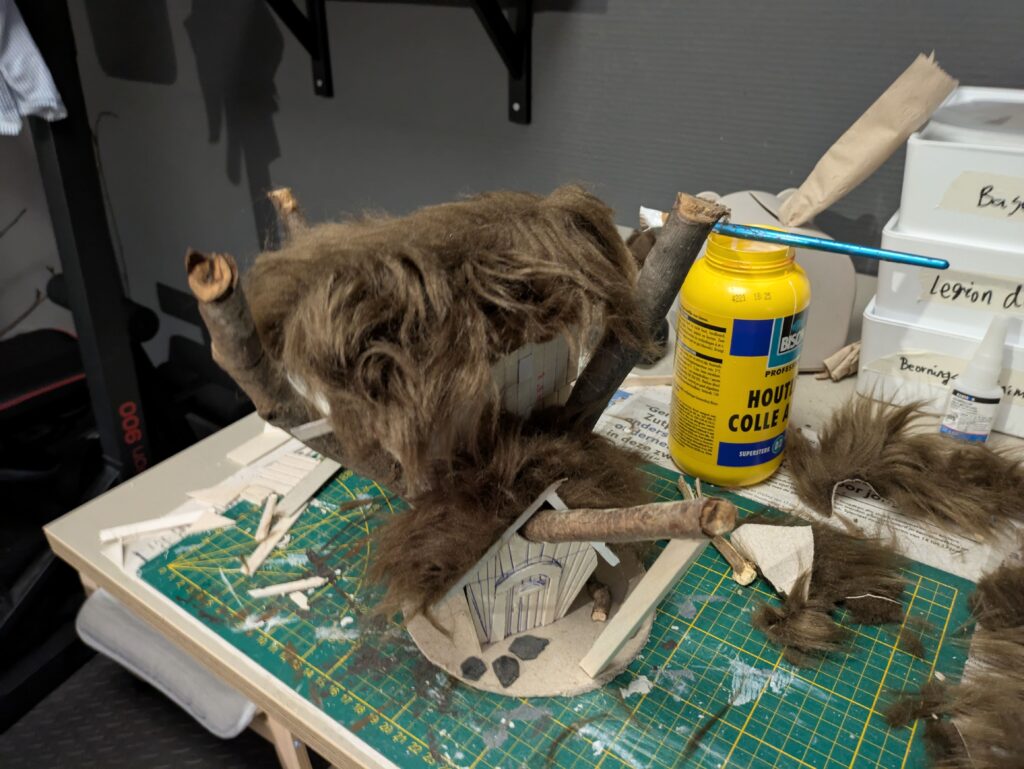
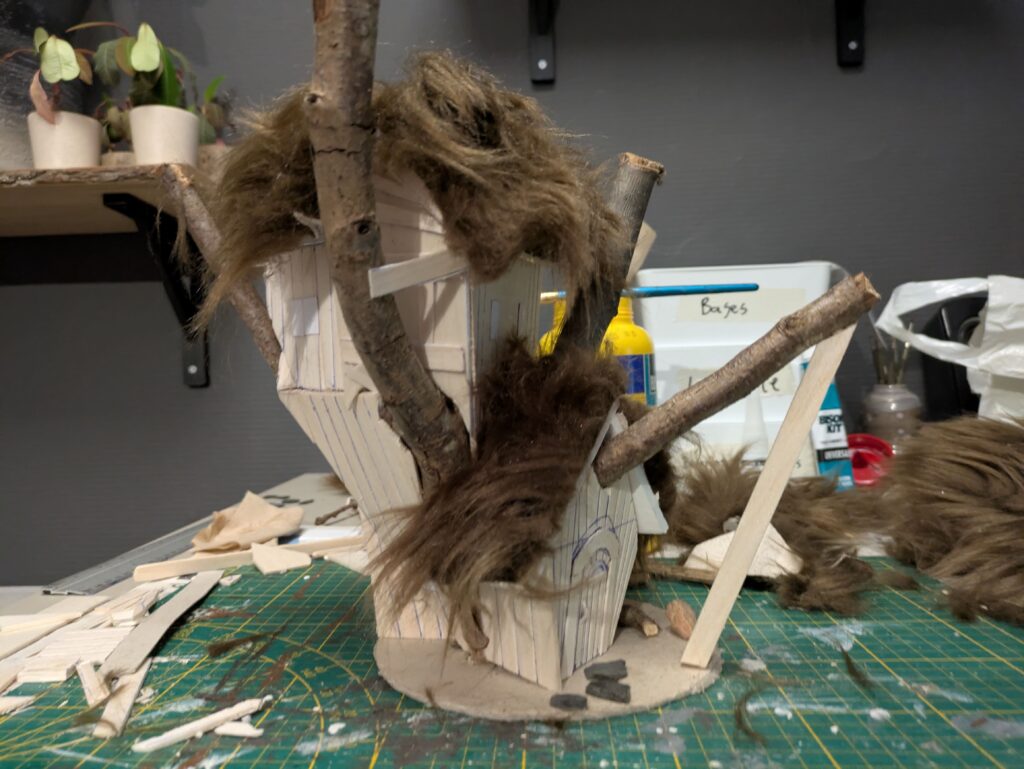
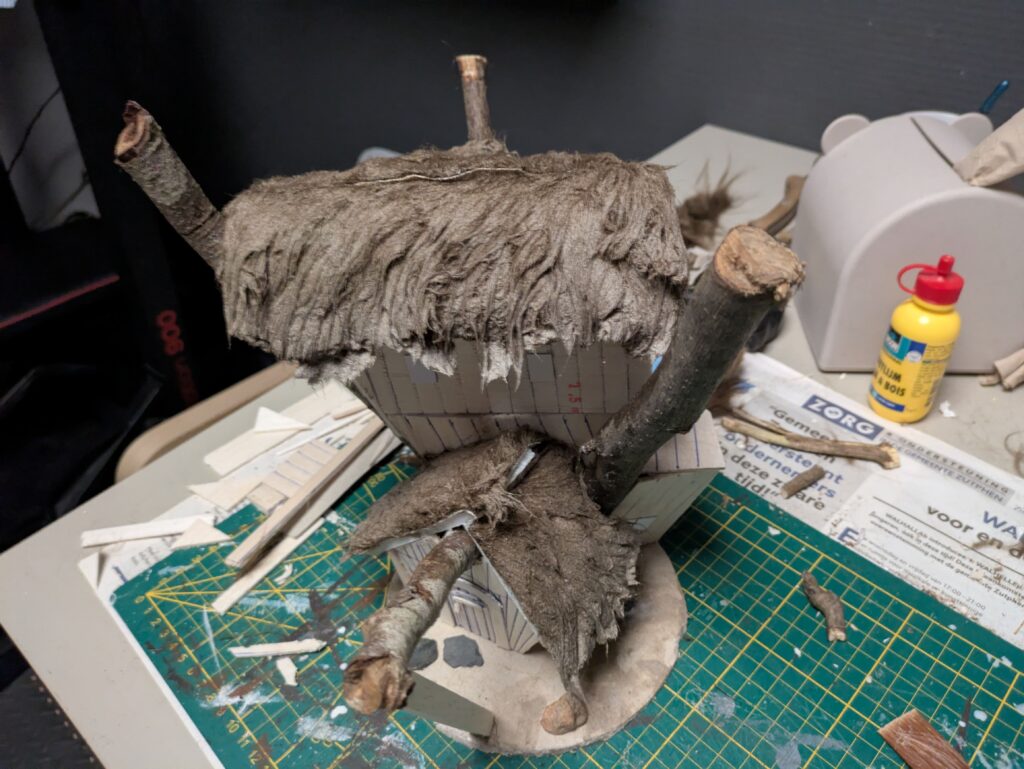
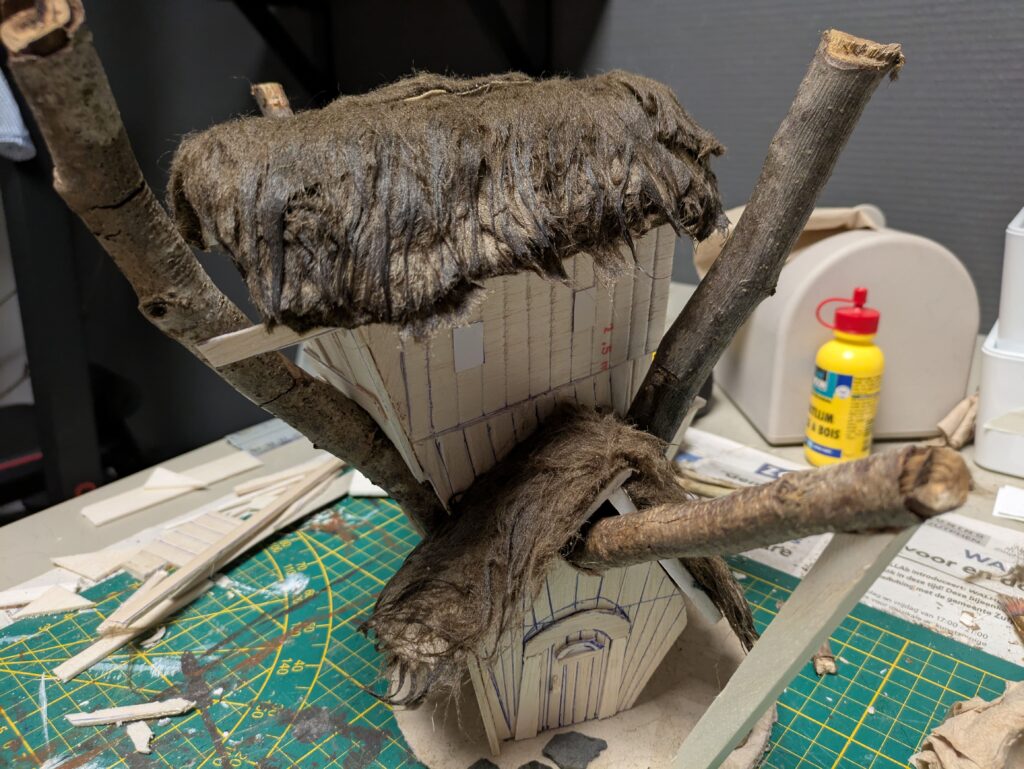
7. There will now be a ‘naked’ strip between the two sides of both roofs. We will solve this by glueing another piece of synthetic fur, generously along this strip. This strip will get the same PVA/water treatment as in step 6.
8. We are almost done building Radagast’s House. One final detail I do not want to omit is the bird’s house that can be seen on the reference image. For that, I will use a small twig and some thin balsa wood (1 mm). To make painting easier, I will leave the separate for now. Finally, I base the base with sand and small stones. I glue some stepping stones leading up to the front door (using slate chippings) and a few larger rocks on the base. All ready for painting and priming!
Painting Radagast’s House (The Hobbit version)
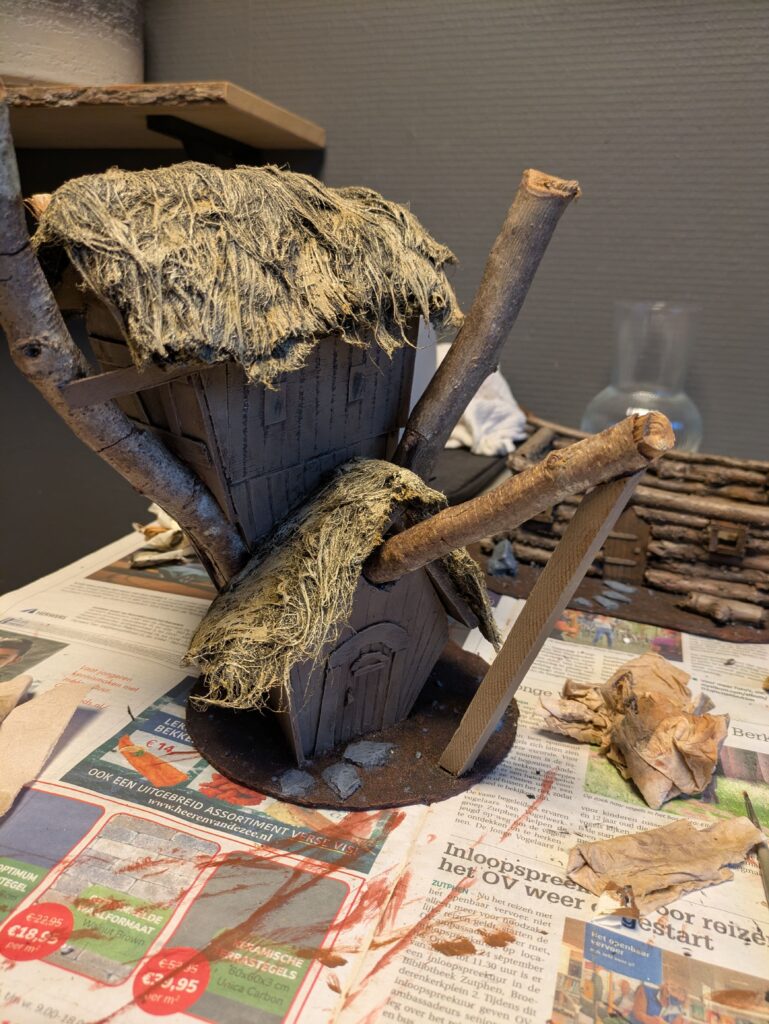
1. Before priming, I used masking tape to cover the twigs. In this way, I can use their natural colours and variation, giving it a more treelike look. I primed in black. Since there is no polystyrene involved, you can safely use a spray paint. After priming, be sure to gently take of the masking tape!
2. I once again put masking tape on the twigs. The painting steps are actually pretty straightforward, so you can easily finish within a day. Meaning the masking tape will likely not take away any bark. I wouldn’t leave it on for more than a day though, so if you do want to spread out the sessions, it’s probably better to take off and put on new masking tape in between sessions.
Since I like to paint my bases first and that is what I’m doing here as well. I drybrushed Doombull Brown on the sand and painted individual rocks with Mechanicus Standard Grey. The stepping stones and larger rocks instead receive a drybrush Eshin Grey, later followed by a drybrush Mechanicus Standard Grey and a light drybrush of Dawnstone.
3. I drybrushed all the wooden areas using Mournfang Brown.
4. I then drybrushed all the wooden areas using Steel Legion Drab.

5. Finally, I used a very light drybrush of Ushabti Bone on the wooden areas.
6. The thatched roofs get a drybrush of Balor Brown.
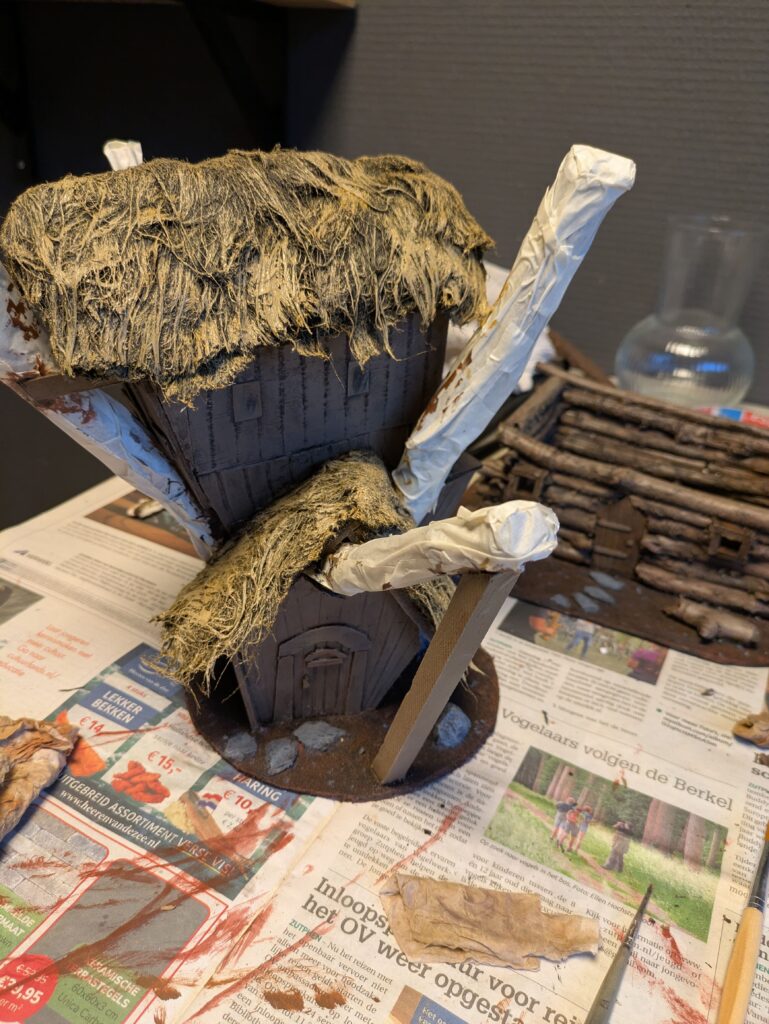
7. Followed by a drybrush of Zandri Dust.
8. Finished off with a light drybrush of Ushabti Bone.
9. Time for the final details. For the windows, I repainted them all black and cut out some more 1 mm balsa wood in the same dimensions (1×1,5 cm). I painted these in the same way I painted the rest of the wooden areas. I then glued these on a number of windows (to simulate closed shutters). On others, I glued them opened or somewhat opened, to give a lived in and welcoming look.
The details on the doors get a slightly more pronounced drybrush of Steel Legion Drab. The small window in the doors get repainted black.
I also painted the bird’s house and glued this on the base. I might add some static grass to the base later. Radagast’s House is finished!

Building Radagast’s / Tom Bombadil’s / Beorn’s Cabin (classic BGIME version)
1. I again started by gathering a lot of twigs/sticks. The more, the better as you’ll have more to choose from. Let them completely dry for a couple of days. I chose longer twigs that were approximately 20 cm long for the front and back of the cabin and shorter ones of about 12 cm for the sides. However, you can just cut to size. The important part is that they are approximately straight for at least those dimensions.
2. I cut a 3 mm thick cardboard to form the base. My base is about 24 by 21,5 cm. I then cut the twigs to size and form the ‘skeleton’ of the house. Use test models to see how tall you want to make the cabin. For me, I wanted Radagast but also Beorn (man form) to fit through the door. My cabin is therefore a bit taller than in the magazine (about 7 cm without the roof).
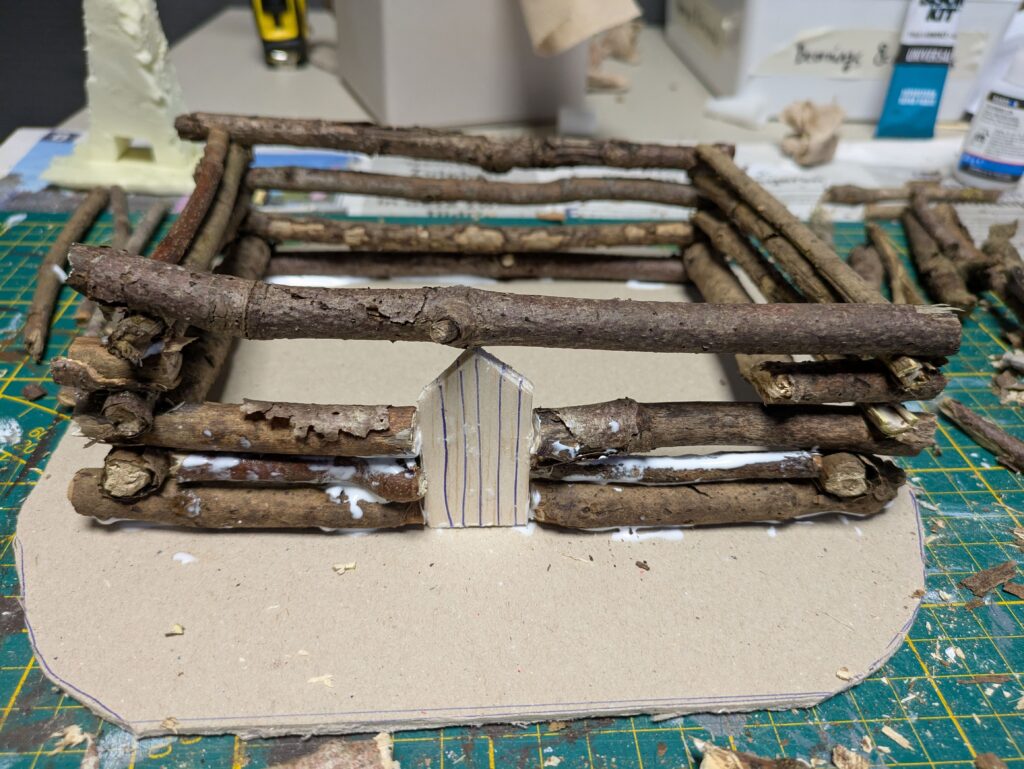
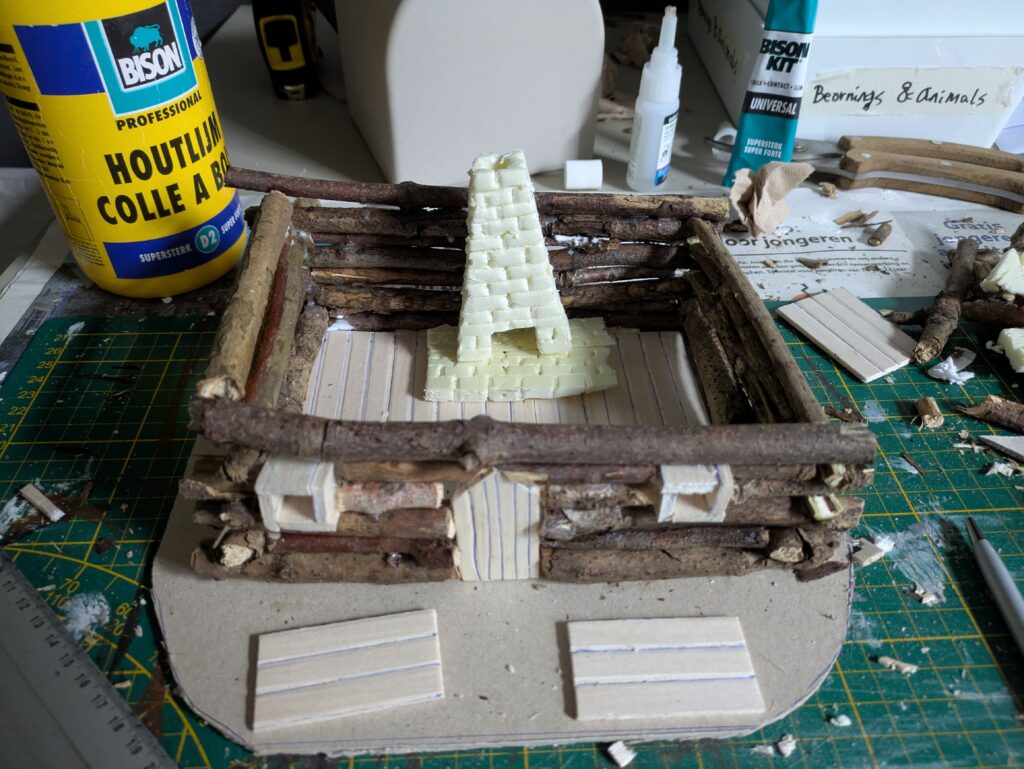
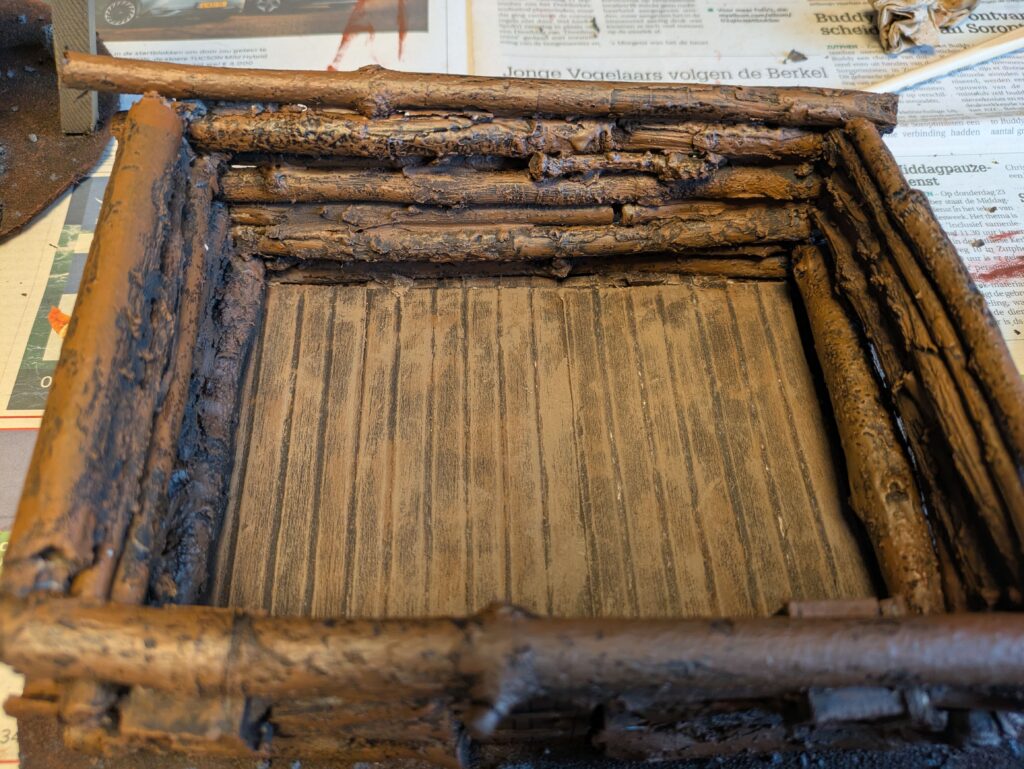
3. For more visual interest, I made two windows that also give a bit of a birdie vibe. This does create some hassle, because now it will be harder for the twigs to align properly. I therefore decided to not place any windows on the other sides of the cabin. I also cut XPS foam for the chimney, as well as cut some balsa wood for the interior flooring. I also made two wooden tables out of balsa wood.
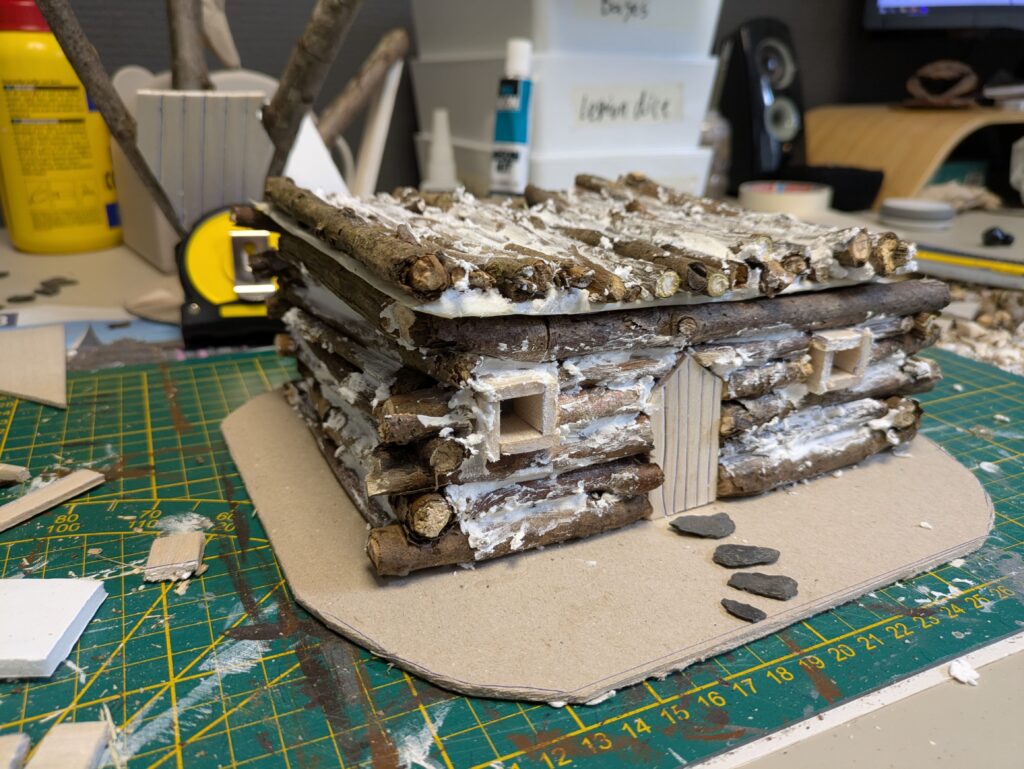
4. The roof will be a separate piece, so that you can use the interior. For this I used foamboard that I cut to size. I then covered this with twigs, which I glued down to it. There’ll be holes all over the cabin, but not to worry! I used filler from the hardware store to fill the gaps.
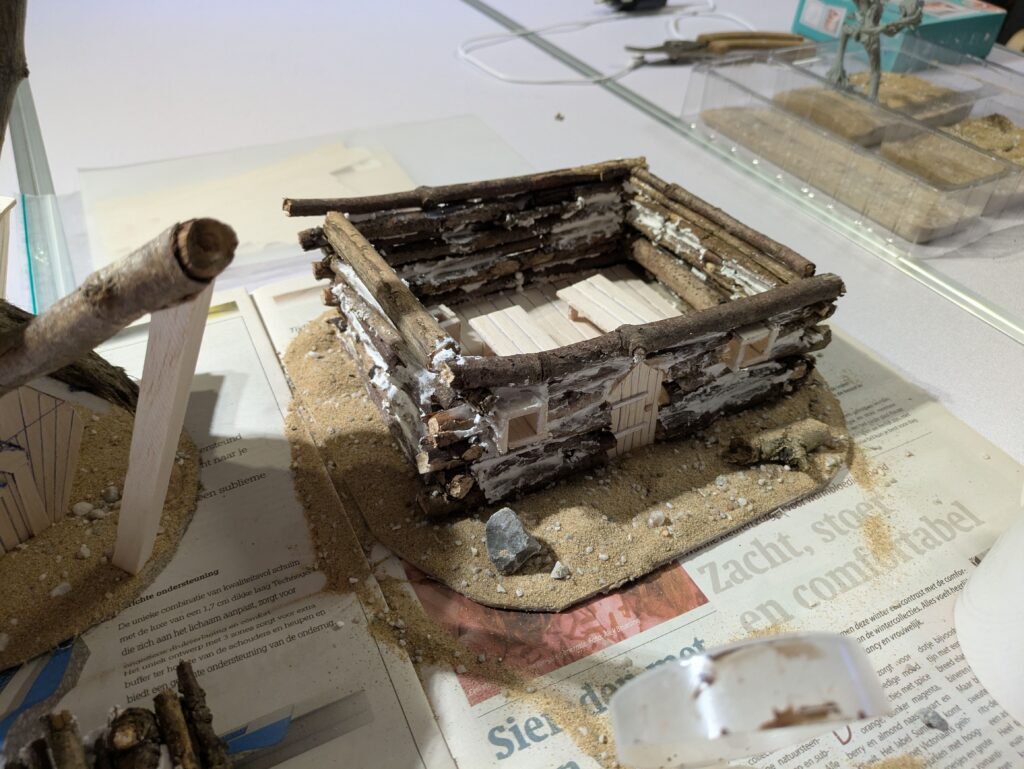
5. In the final step, I based the base using my usual basing method: sand with smaller rocks sprinkled in. I also used slate chippings as stepping stones walking towards the door. Finally, I put a larger rock and twig (tree trunk) on the front for more visual interest. Everything is now ready to prime in black (except the XPS chimney, which would melt when sprayed)!
Painting Radagast’s / Tom Bombadil’s / Beorn’s Cabin (classic BGIME version)
1. This time I wanted to paint over the natural twigs, to give it a more uniform look. I therefore just spray painted the whole thing black, except for the XPS chimney which I painted black by hand.
2. I started painting the base using a drybrush of Doombull Brown on the sand. I then painted the individual rocks with Mechanicus Standard Grey. The stepping stones, larger rock and chimney instead receive a drybrush Eshin Grey, later followed by a drybrush Mechanicus Standard Grey and a light drybrush of Dawnstone.
3. I did a heavy drybrush of all the wooden areas using Mournfang Brown, except on the wooden tables.
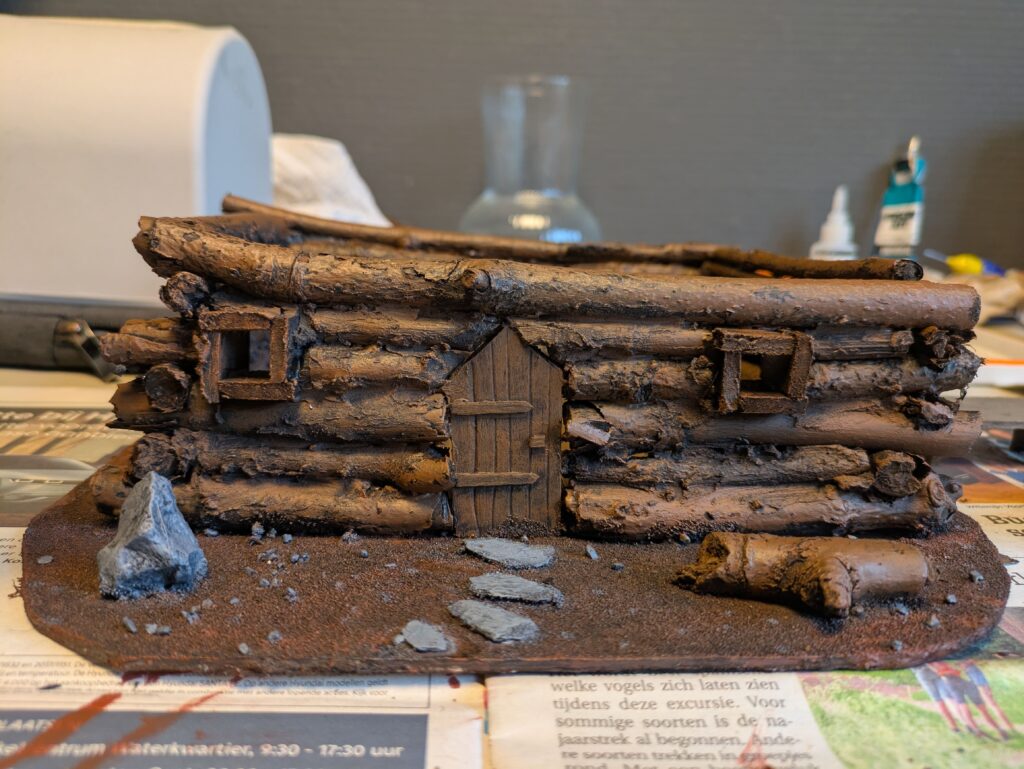
4. I then did a lighter drybrush on most wooden areas using Steel Legion Drab (including the wooden tables, but excluding the door). I wanted the Mournfang Brown to still be the primary colour for most of the wood, especially the door and windows. The wooden flooring received a heavier Steel Legion Drab drybrush, to make it look a bit different than the walls.
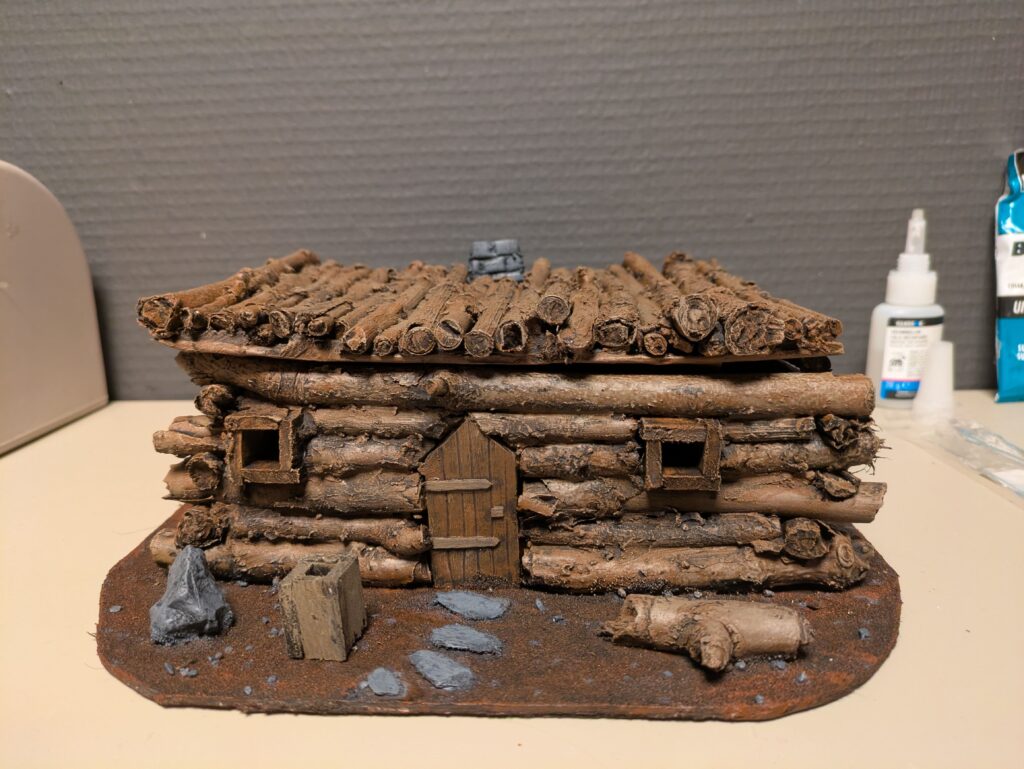
5. Finally, I used a very, very light drybrush of Ushabti Bone on the wooden areas (except the door). The details on the door get painted using Steel Legion Drab, to give it some contrast. You can put some static grass on the base if you like. And with that, Radagast’s Cabin is finished!
Photos in action


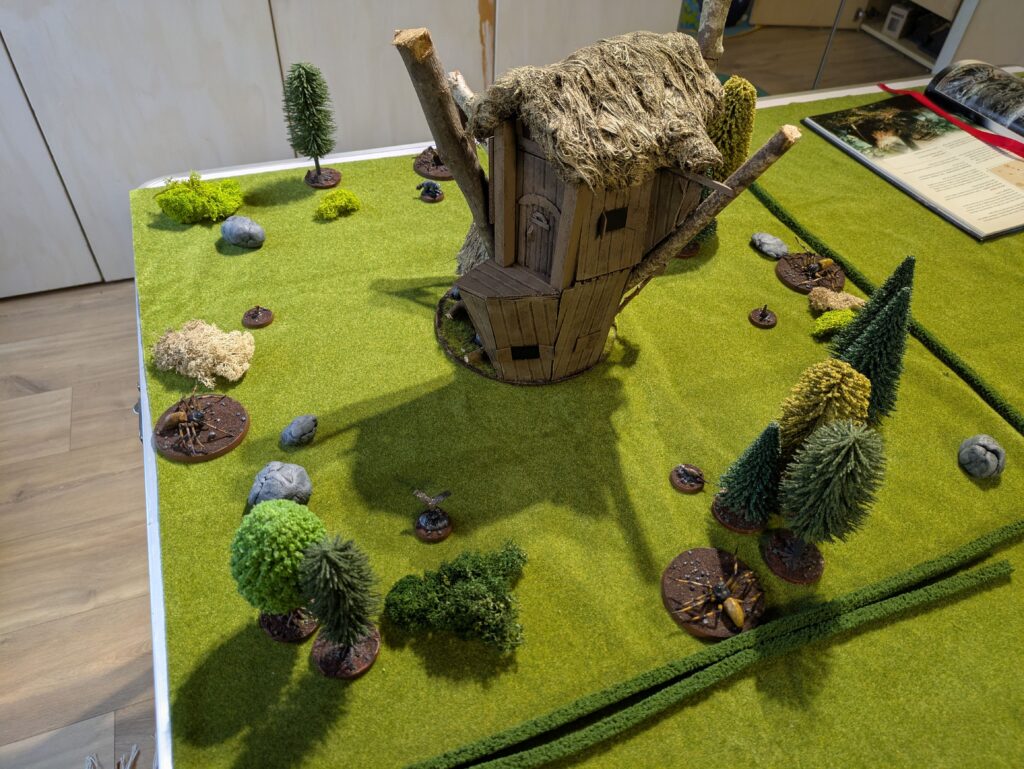
Scenarios
Radagast’s House is part of the following scenarios:
The Hobbit version: Attack on Rhosgobel (FotN 2021 #8)
Classic BGIME version: Kill the Wizard (BGIME #79)
These are both fantastic terrain projects, mate! One of the coolest things about MESBG is getting to make some of your favorite locations and so its really cool to see what you’ve come up with. I’m looking forward to seeing these feature in future games as well!
Thank you! Yes, making unique and awesome locations for places in MESBG is one of my favourite parts of the hobby. 🙂
Pingback:Fall of the Necromancer – Scenario 8: Attack on Rhosgobel - Aiwendil